Photographs by Frank

26 August 2013

Making Cameras, Not Photographs

Filed under: Off Topic — Tags: — Frank @ 6:00 PM

The language we use to describe photography is sometimes quite curious… most folks talk about “taking” photographs. “Taking”, in my view, is not the correct word. One implication of  “taking” is that something (maybe the subject of the photo?) is diminished in the act… if I take candy from the baby, the baby lacks candy, if I take a photo of the same baby, she or he looses nothing!

The proper phrase for the act of tripping the shutter is “making a photograph” as this is inherently an act of creation. I am not sure that I have been successful in convincing any of my circle of  photography acquaintances in changing their use of the language, but I’ll keep using “make”, not “take” in this regard. I’ll keep tilting at windmills too!*

Oh well… back to the main act.

I note that, again, have not written a blog entry in over a week. This is because I have been spending time making photographic apparati rather than making photos.

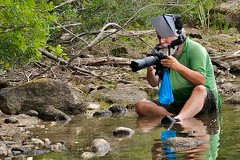
First, I decided that it might be worthwhile to stabilize the relationship between camera and lens in the apparatus I described a week, or so ago in “Experiments in Optics“. The result is show in the first photo below and the four photos following are test shots from around the yard. Now all I have to do is find some time and energy (it is heavy!) to take it further afield. (Kevin… I’ll definitely try some flowing water.)

In addition to this decidedly nonstandard photographic contraption, I also spent a couple of days constructing a classic sliding box camera for 4″x5″ film. I used another old lens I had lying around; an 6.5” f/4 doublet with an aperture but no shutter. I have no clue as to its former life. Instead of ground glass for the back, I used a piece of an el cheapo (2 for 99 cents at Ocean State Job Lot) plastic chopping mat. These are textured on one side and smooth and shiny on the other and one can form an image on it just like ground glass.

In action, the ground glass and its frame get replaced with a film holder that I forgot to take make a photograph of of this blog article.

The last two photos below show “Big Red”.

Now comes the big step…  setting up a darkroom. Fortunately I won’t  need anything too fancy if I stick to lith film. I figure that I’ll use the negatives to make cyanotypes and maybe, eventually, silver contact prints. We’ll see if I follow through. Setting up a dark room from scratch in the 21st century… I must be nuts! Stay tuned!

[scrollGallery id=220 autoscroll = false width = 600 height = 600 useCaptions = true]


*When I was teaching, I used to tilt at another, similar windmill.

Both students and faculty invariably use the word  “give” when it comes to grades. I gave Sally a B on the last test. Professor Jones gave me a B in biochemistry. Wrong!

On the first day of each semester, I would announce to my students that I had never, ever, ever, never given a grade in my teaching career. Invariably, this led to many puzzled looks. Only some of the puzzled looks disappeared when I continued by saying that the grades in my courses are  earned by the students.

For years, I would bring up this issue of proper language around grades with my windmills faculty colleagues. I never got very far there either!

28 May 2012

Lady Slippers

The lady slippers are in full bloom around here.

On Saturday, Joan’s cousin Suzy called and said that they had one blooming right at the side of their driveway. I, of course, headed down there the first chance I got and took a bunch of photographs, playing with the lighting, angles, background, etc.

This morning, I was out back by our shed and noticed a lady slipper right between the shed and the outhouse (now used as a tool shed). Upon further exploration we discovered close to a dozen under the pines and hemlocks right behind the house. Of course,  I spent another interval photographing them.

[nggallery id=137]

Warning… photo-geek talk below coming next!

Both these photos were taken in full “Strobist-mode”. Both the camera and the flash were set to full manual mode. I set the aperture to get a nice out of focus background and the shutter speed to get the exposure I wanted on the background (under exposing it dramatically). Finally, I set the flash power to get the desired exposure on the flower.

In the first photo the flash was bare and about 18 inches away. I used a collapsible diffuser to place the flower in essentially open shade.

In the second photo the flash was about a foot way and was equipped with a “softbox”. Again, I used the diffuser to place the flower in “open shade”.

I thought that I had left the softbox at home for the first photo and had to make a choice between using the diffuser in front of the flash or to provide shade.  It turns out that the diffuser was in my backpack all of the time… I just hadn’t looked hard enough… heavy sigh!


3 January 2012

“Our” Beaver Swamp

Filed under: Landscapes,Monadnock Region,Winter — Tags: , , — Frank @ 6:00 AM

We, and our neighbors, share the back of our lots with a beaver or two. The beaver swamp runs roughly north-south for about half a mile and we live at the southern end. There are two dams and two lodges. Last summer I spent a lot of time stalking odes in the marsh and around the deep water near the southern dam and lodge; these are probably on our property (although its hard to say for sure).

Yesterday afternoon, I headed out to photographed this wet land from the northern dam. In the afternoon, the light is better in this direction and as I headed out I was hoping for some dramatic clouds as the weather broke.

I was well rewarded for a mile-and-a-half (round trip) walk and the ninety minutes or so that I worked the scene; staying until the light in the foreground faded. The temperature was about thirty degrees and there were three or four brief periods of snow. The wind was blowing which meant lots of changing clouds. All of that sounds worse that it was, dressed properly and thoroughly engaged in “the moment”, I did not feel cold at all.

[nggallery id=121]

Warning… photo geek talk ahead! Proceed at your own risk!

The right equipment really helps. Both of these images were taken with a graduated neutral density filter. I have had a couple of these filters for years. In the past, I often left them at home and ended up regretting not  having  them with me. The reason? No room in my backpack. I recently bought a much larger (and better fitting) backpack. This time I had the filter with me!

While on the subject of gear… On Saturday I put a winter coat on my tripod. Aluminum tripods make for good heat sinks and thus very cold hands (even with gloves on) . Thus the winter coat!

My tripod’s winter coat consists three pieces of foam pipe insulation of the appropriate diameter and a bit of duck tape. An eight foot length of the pipe insulation cost $3.49  at the hardware store. Less than 10 minutes after I got home, my tripod was fully clad with insulation on the upper sections of  each leg and ready to go. I even had enough left over for a fourth leg! Come spring, I’ll remove my tripod’s winter coat and store the pieces away until the following winter. Hopefully, I’ll be able to find them again!


30 October 2010

Black and White Landscapes – Revisited

Filed under: Uncategorized — Tags: , , — Frank @ 11:24 AM

I  have a new tool, an ink-jet printer… it is not a toy, no matter what Joan says! She seems to believe that adage “The difference between men and boys is the price of their toys.” Not me… I’m sticking with “tool”!

One of my main motivations in making this purchase was to get a printer with multiple “black”  (i.e. black and two shades of gray) inks. This enables one to print true black and white images.

My old printer, which is four or five years old, is still working fine but it has only one black ink, among a bevy of colored inks. This means that even “black and white” images are printed using the color inks and this makes it essentially impossible to get truly neutral shades of gray out of it. Despite my best efforts (including building, refining and re-refining custom profiles for each paper) all my black and white prints made with this printer had an ever so slight green cast to them.

Actually, until I directly compared some of these old prints to ones from the new printer, I thought that they were perfectly  neutral… and they are very close  in some light (i.e. day light) and not so close in other light (e.g. fluorescent light). Ugh! But such is the nature of the beast. The old printer is simply not the right tool for creating black and white prints. However, the new printer is a perfect tool  for black and white printing.

The ability to print “real” black and white has caused me to go back though my images and rework some of them before printing them with the new tool. All of these images, which were captured in the last roughly four years, were originally presented as black and white images but I went back to the original color files to rework them.

The reason for this is two-fold. The software tools for processing images gets better (and more complicated) with time and my skills in using the tools also, hopefully, gets better as well!

So, here are a half dozen landscapes that I have reprocessed and printed in the last few weeks. Some of them are significantly different from the older versions and some very similar, so much so that the small electronic versions displayed here will not look different from the older versions. However, the prints from all of them are much, much better than I could have done with the old printer.

[nggallery id=34]

In closing, I am reminded of a quote from Ansel Adams (Wikipedia entry). Old Saint Ansel,  perhaps the most famous landscape photographer even a quarter century after his death, was purported to say:

“The negative is comparable to the composer’s score and the print to its performance. Each performance differs in subtle ways.”

I think that this is still (maybe even more) true in the digital age. Not only can we reprint images as our skills improve and the tools change, but we can reprocess our “negatives” … the original (raw) file… as well!


25 August 2010

The Odontate Rig in Action

Filed under: Uncategorized — Tags: — Frank @ 8:00 AM

Loyal readers will remember, I started the summer by assembling and testing a “dragonfly rig“.

Most of the photos I have taken this summer used “the rig”. A few folks have asked to see the rig in action. So here are a couple of photos.

Joan took this (somewhat staged) one as I returned from an “expedition”:

[singlepic id=188 w=320 h=240 float=]

My friend Dana got a candid shot during his visit earlier this summer:

DSC_0382-web

Click either image for a larger view.

P.S. to Joe… no photos of me flat on my belly in the water yet! It is not that it hasn’t happened recently. It is just that Joan does not want to spend here day’s following me around waiting for it to happen!


26 June 2010

Flowers At Close Range

Filed under: The Yard — Tags: , , — Frank @ 12:00 PM

After my experience with using all three extension tubes for photographing ants and aphids, I decided to experiment a bit more with using all of the tubes (36 + 20 + 12 mm) on both the 70-300 mm telephoto lens and the 90 mm macro lens. In all cases I used the “dragonfly rig” for the flash.

To conduct this experiment I headed out the backdoor and explored Joan’s flower beds. My basic conclusion is that this is hard work!

The depth of field is very small, the range of distances that can be focused is also small and small movements of the tripod make huge changes in what you see through the view finder. No wonder serious macro photographers using focusing rails!

Anyway, here are some of the results…

[nggallery id=18]

Note the mottled white/gray background in a couple of the images. One problem with flash is that sometimes the backgrounds “go black” which is usually not desirable. When this occurred, I used a crumpled up tissue that I happened to have in my pocket as a background. I hand held it behind the subject as I tripped the shutter. It looks pretty good in my opinion… “interesting but not distracting”.


14 June 2010

The Dragonfly Rig

Filed under: Odontates,Other Insects — Tags: — Frank @ 12:00 PM

Warning… photo geek talk below!!!

A number of people have asked me about the tools I use to shoot odontates (i.e. dragonflies and damselflies). So here is the answer!

The  basic “problem” is that these critters are relatively small and somewhat wary. Thus one needs significant magnification and decent working distance.

In the past I have used the Sigma 50-500 mm zoom to make photos of dragonflies… this lens has a short (for a long telephoto) close focus distance which allows for modest magnification so some cropping is needed to make a “frame-filling” image. This lens is also large and heavy and therefore it needs a tripod (or monopod) which limits mobility.

In looking for a better solution, I switched to a Nikon 70-300 VR mm lens with a 36 mm extension tube. This combination often allows one to make frame-filling images of dragonflies and it is much lighter, allowing one to hand hold the rig (the VR helps here too).

I have been using this rig for about a year now and have made many nice photographs with it. But… isn’t there always a “but”… this spring I decided to go further!

Shooting at high magnification leads to a small depth-of-field. I’m not going to try and explain the physics of the situation… it is just a fact of life… the higher the magnification the small the depth of field.

The way to get more depth of field is to decrease the aperture (i.e. increase the f number).  Of course, this leads to less light reaching the sensor and that needs to be compensated for with a longer exposure or a higher ISO both of which cause their own problems… life is tough!

Adding some extra light (from a flash) into the picture (pun intended… go ahead and groan!) would help to mitigate these problems. However, the quality of the light is important … direct flash coming from directly over the lens is, to put it simply, ugly!  The flash needs to be off camera and it will need some diffusion.

Adding off camera flash to the mix introduces a problem that comes with having only two hands… one of which is usually in use to trigger the shutter and the other of which is usually in use steadying and operating  the long lens! There is no hand “left over” to hold a flash nearby. Thus one needs to tie the camera and the flash together.

So here it is (click for a larger view)… everything all in one unit:

This unit is, to put it simply, large and unbalanced! As most people do, I usually use my left hand to steady a long lens and my right hand to work the camera controls and trigger the shutter. This was impossible to do with this rig… the flash hanging way out on the left really unbalances things and I could not hold it steady.

The solution… use the flash bracket as a handle. By gaffer taping my cable release to the flash bracket, I can now trigger the shutter with my left hand (which is also supporting the heavy side of the rig) and use my right to operate the lens. With this system, I’m going to have to stick auto exposure since the other camera controls haven’t moved. This is not a big deal for me as I usually use matrix metering in aperture priority mode anyway.

The total unit is still large, heavy and unbalanced enough to cause pain in my wrists and elbows on my first few outings.  The torque it puts on ones joints while in use is significant. I have diminished this problem in two ways… by remembering to let the rig hang from the neck strap between shots and by supporting the rig with a monopod when possible. Of course the monopod limits my mobility a bit and needs to be removed to get a really low perspective. But life is full of compromises… isn’t it?

One last comment… the magnification provided by this rig is just not quite there yet when it comes to damselflies, so I am still resorting to cropping in order to “fill the frame” with these critters. The solution, of course, is more magnification (attained by adding another extension tube). I have my doubts as to the ability to get a crisp image at even higher magnifications without resorting to a tripod, but I will be experimenting over the summer and time will tell.


Powered by WordPress